A Little Sourdough Story
A few years ago, I started learning all about sourdough bread and I was completely fascinated by the process. The patience, care, and dedication it takes to create a beautiful loaf from just a few simple ingredients. It is lovely, even when it does not look perfect.
My family quickly realized this might have been one of my best ideas yet. The act of mixing, folding, and shaping dough is incredibly therapeutic for me. There is something so special about waiting for the dough to rise and then filling your home with that unmistakable, comforting aroma as it bakes.
One of my favorite moments is watching my boys hover nearby, eagerly waiting for the loaf to cool just enough before slicing into it. Those little moments, simple, warm, and shared, are what makes the process so special.
Here I have a simple and very beginner friendly recipe that I hope you enjoy as much as we do.
I will have a more detailed and longer version of sourdough bread recipe that will produce an even lighter and airier crumb soon with a more pronounced sourdough flavor.
If sourdough is not your thing, I will be sharing a yeast version soon that produces similar results.
Ingredients
- 4 Cups bread flour *scooped and leveled into cup (500 g)
- 1 1/2 cups water *plus 1-3 tbs if needed (350 g)
- 1/3 cup active sourdough starter *slightly heaping (90 g)
- 2 tsp salt (12 g)
Instructions
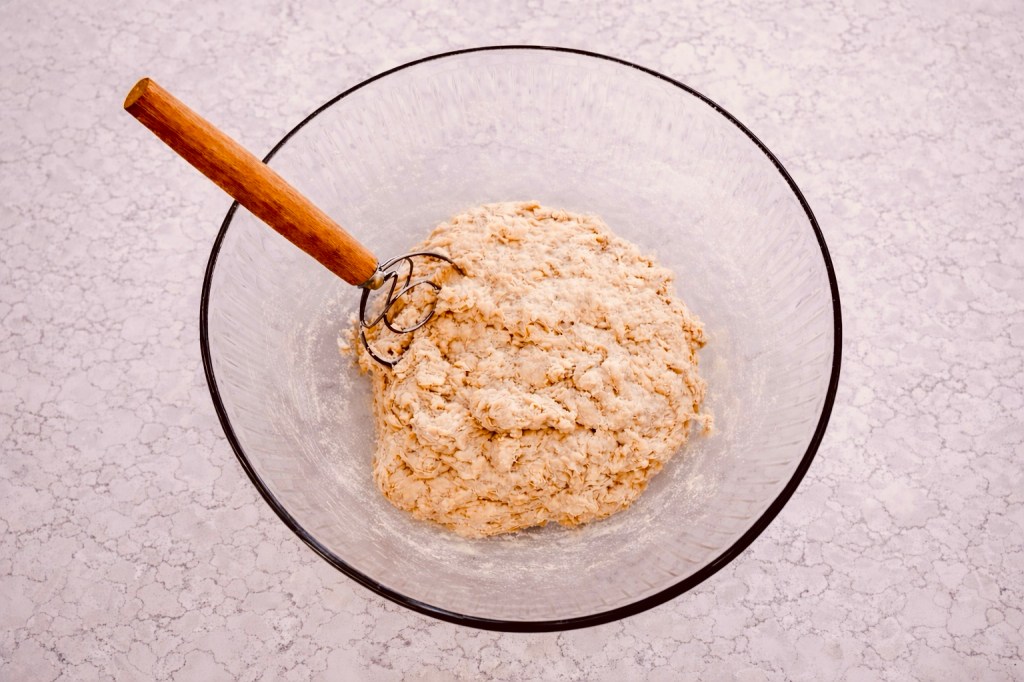
In a large bowl, combine the starter and room temperature water. Stir until mostly dissolved and then add the flour and salt. Mix with a danish hook until a shaggy dough forms. Let it rest for 10 minutes and then lightly knead until it is more uniform. Cover and let rest for 30 minutes. (This helps relax the dough and hydrate the flour before the stretch and fold)
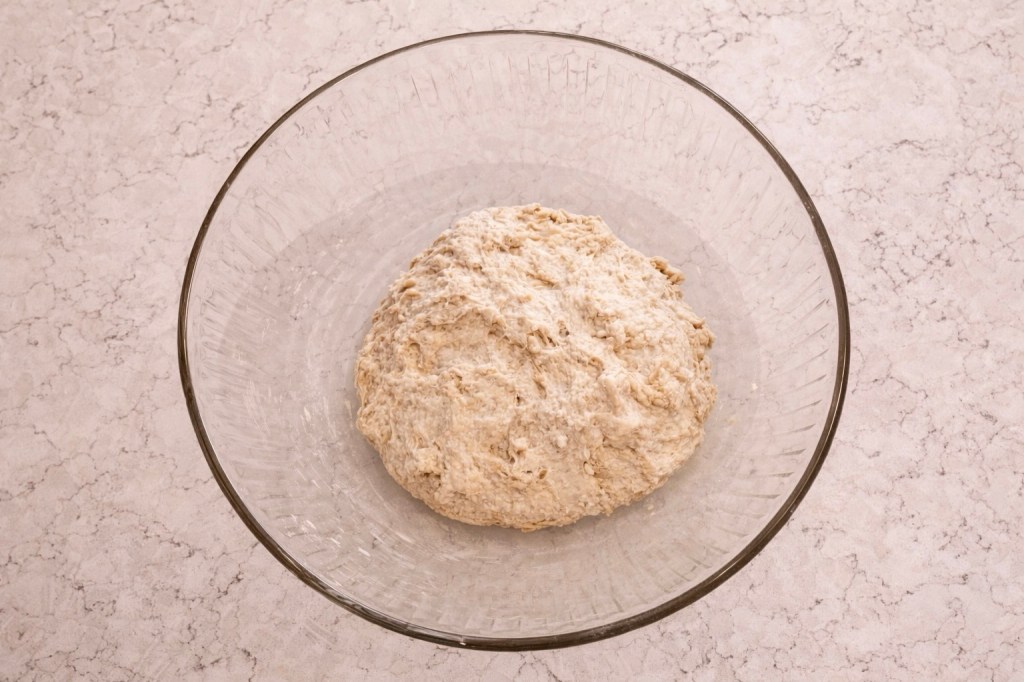
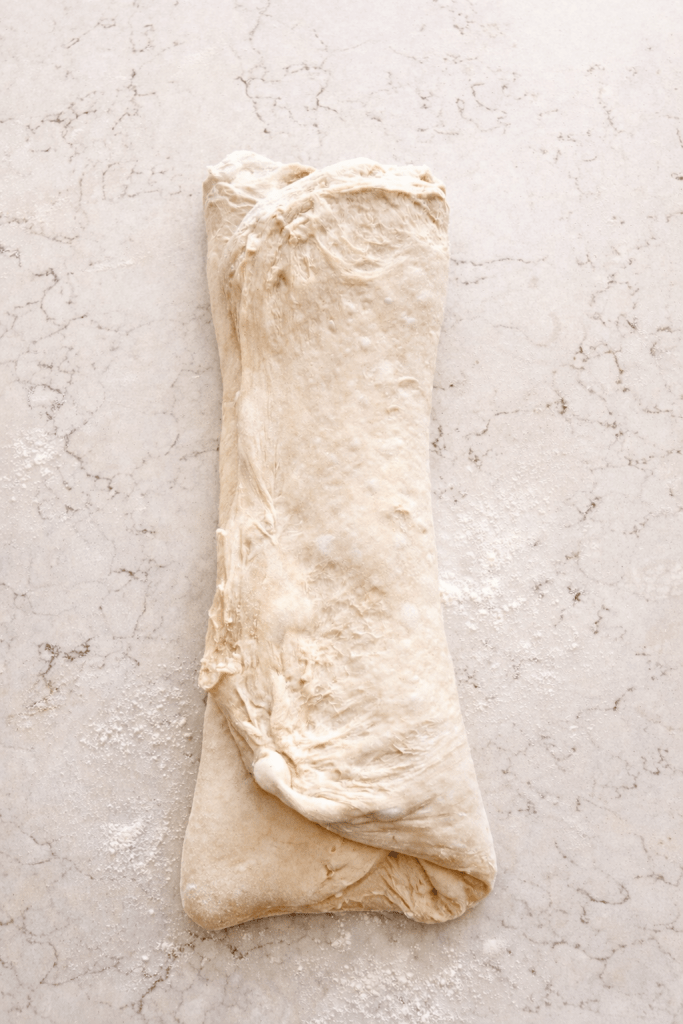
After the first 30 minutes rest, carry out a stretch and fold. To do this, gently stretch one side of the dough up and fold it over itself. Repeat this fold on all sides by rotating the bowl as you fold. Cover and let rest for 30 minutes.
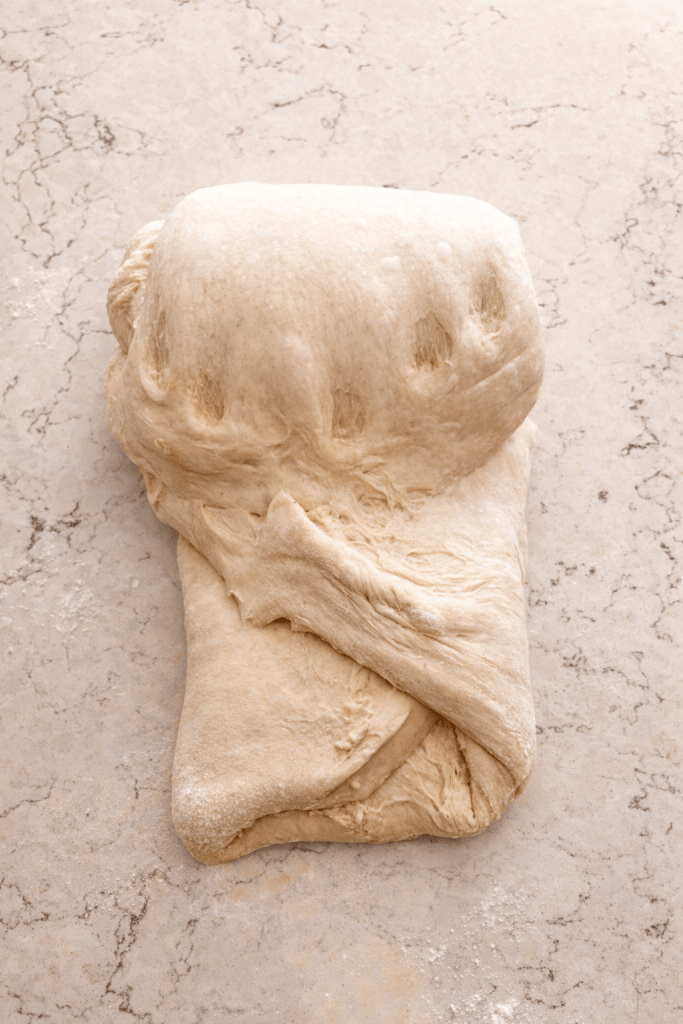
For the next 1 to 1 1/2 hours, do 2-3 coil folds every 30 minutes. Start by lifting the dough from the center and folding it under itself, like a letter fold but underneath. Rotate the bowl 90 degrees and repeat the process once more. You are looking for the dough to become smoother and more elastic. Cover between each set.
After the final fold, cover the dough and let it rise at room temperature. It should increase by 50% and look airy and smooth. This can take between 3-5 hours or less if your home is very warm.
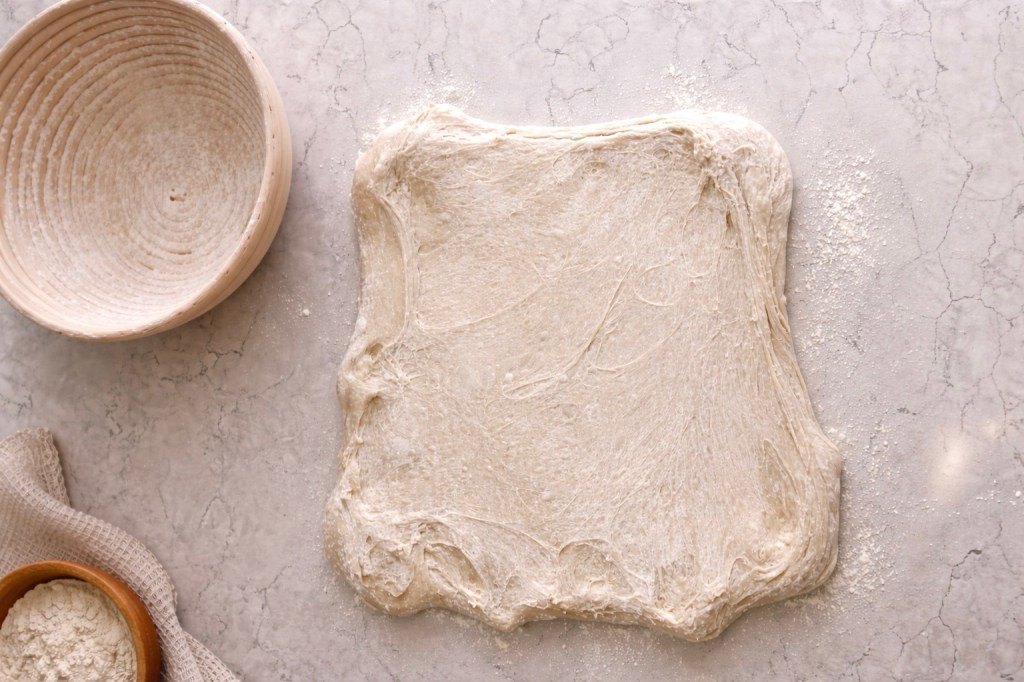
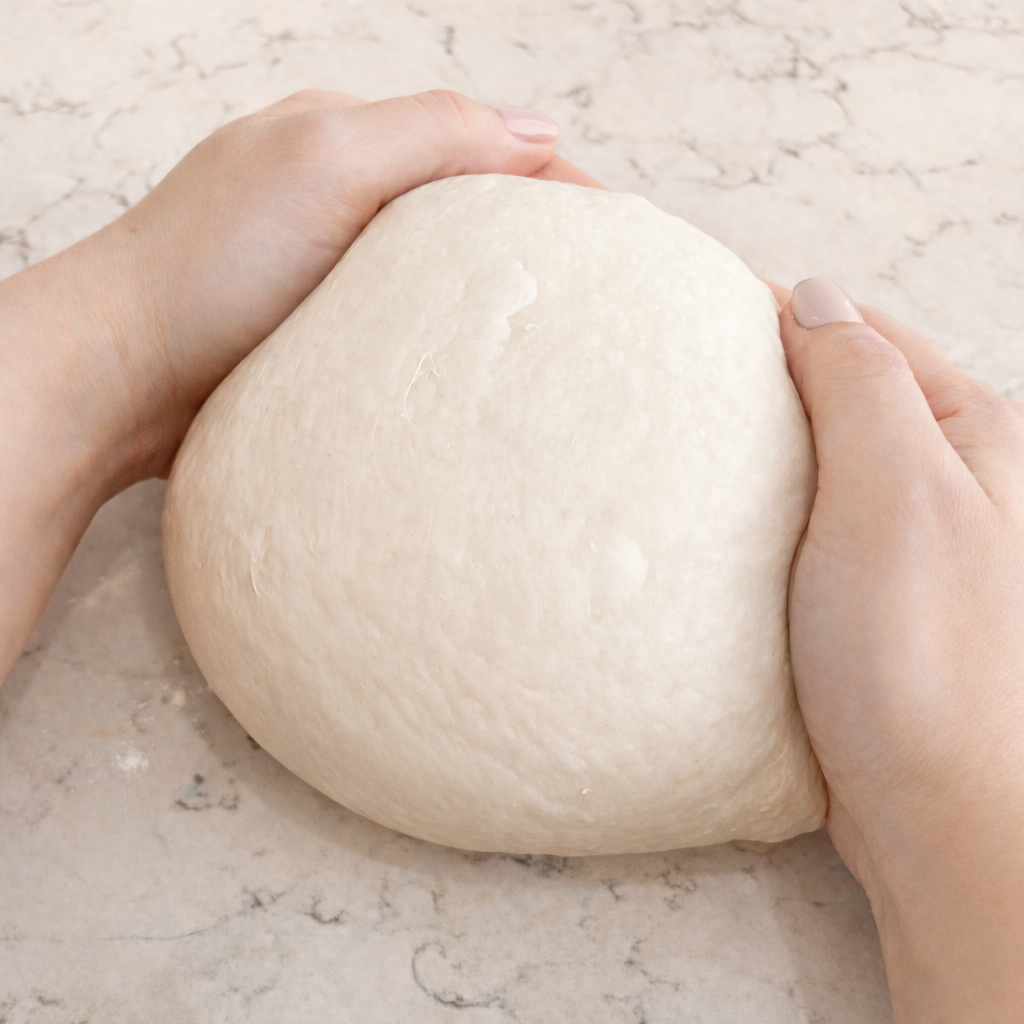
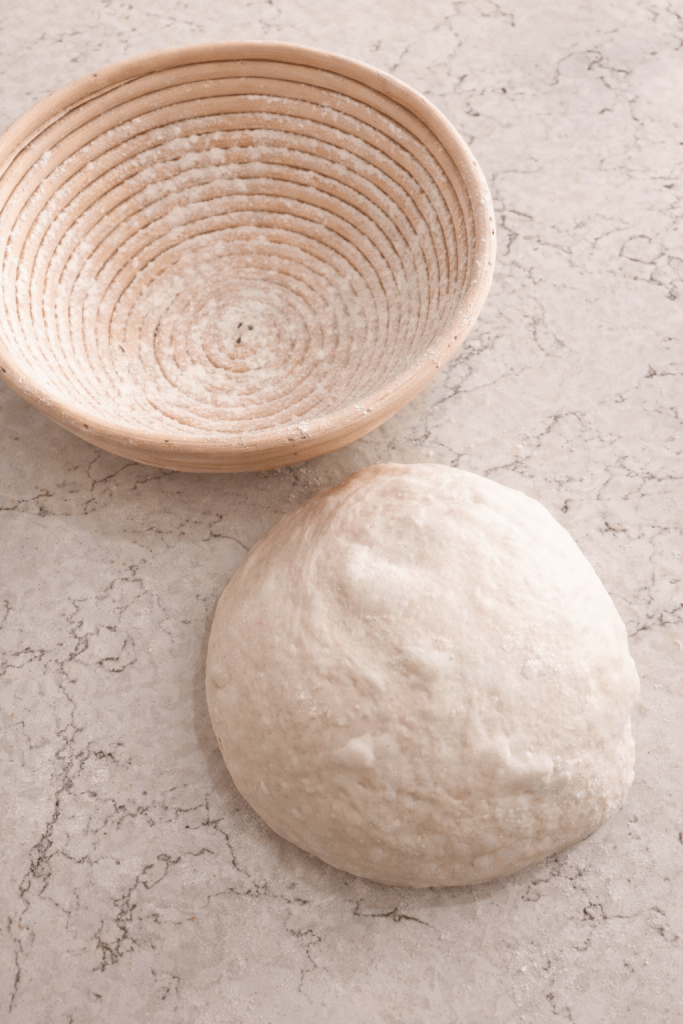
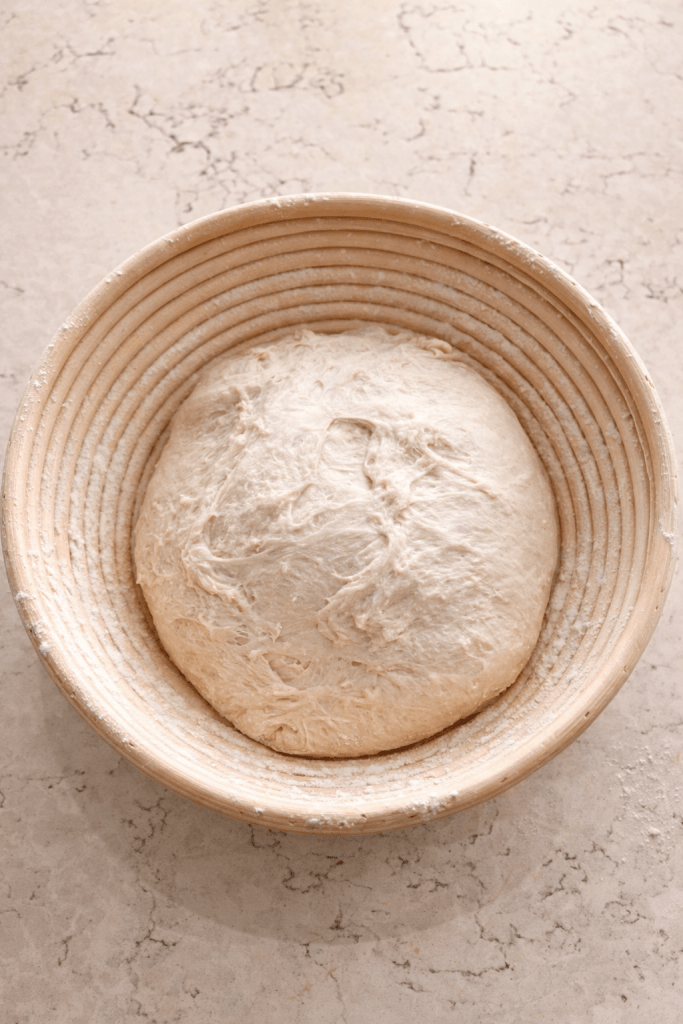
Turn the dough onto a lightly floured surface. Gently stretch the dough into a rough rectangle, being careful not to deflate it too much. Fold over one side and then the other side on top. From the top of the folded dough, gently roll it towards you. You will have a round shape. Using both hands, roll the dough towards you to seal the bottom. Gently flip the dough into your floured proofing basket, seam side up. Pinch the seam to close it and lightly flour it and cover. Let rest for an hour and then cold proof overnight in the refrigerator.
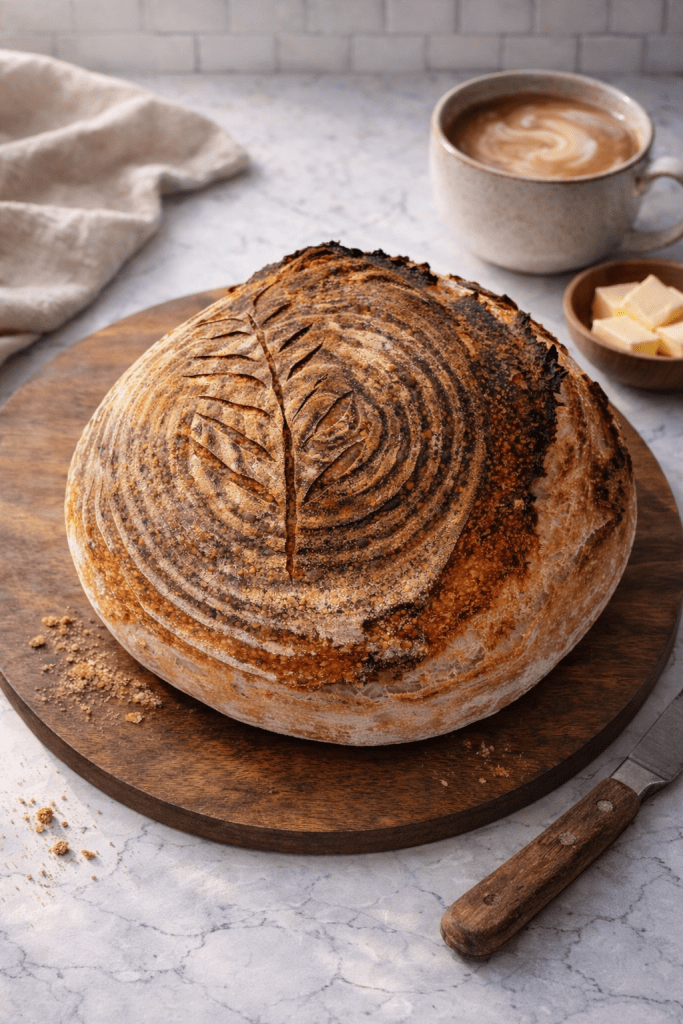
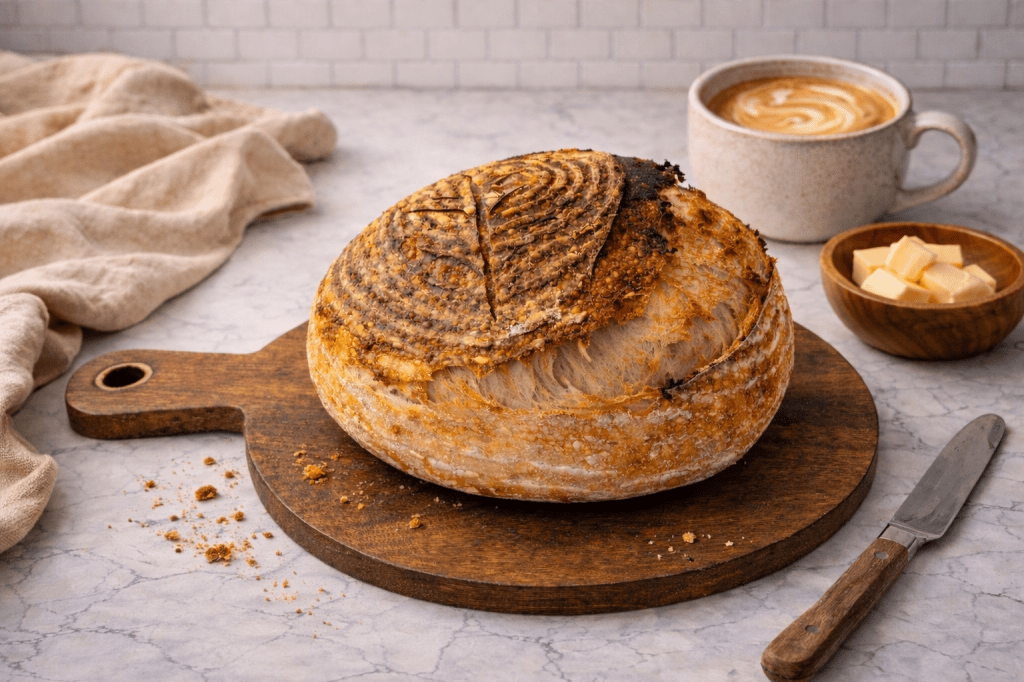
Next morning preheat the oven to 450 F with a Dutch oven inside. Carefully invert the dough onto parchment paper and score the dough to release steam as it bakes. Place the dough inside the Dutch oven with a lid and bake for 20 minutes. After the first 20 minutes, remove the lid. Then, bake an extra 15 to 20 minutes or until it is golden in color.
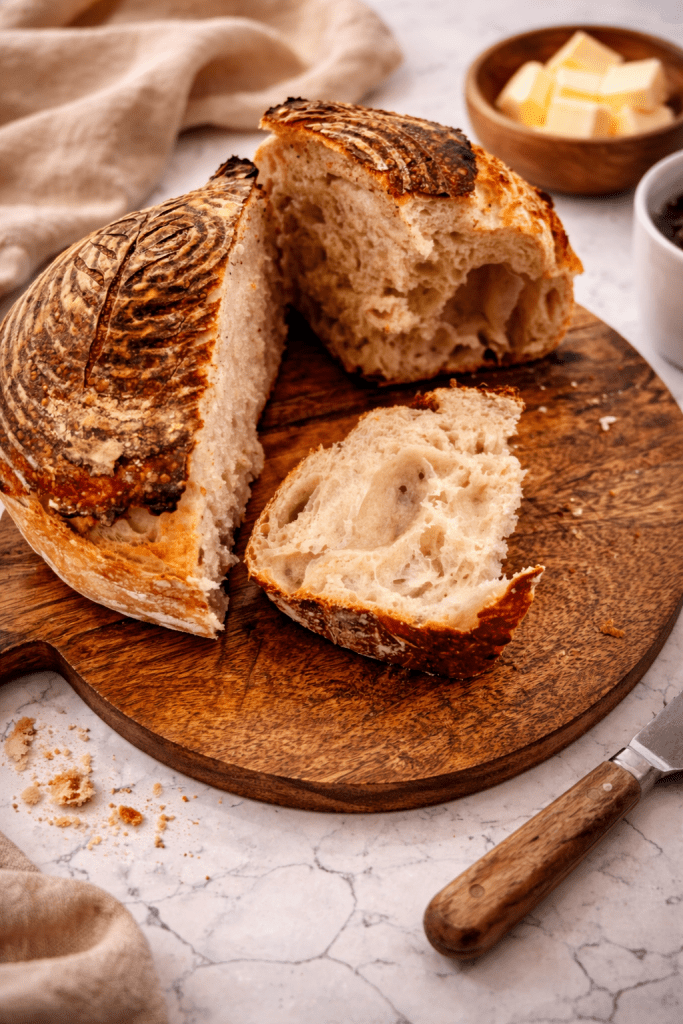
Let the bread cool before slicing.
Notes from my Kitchen
When first mixing dough, if it seems too dry, then add 1 to 3 tbsp. Continue adding until it looks like a shaggy dough.
Don’t have bread flour? You can use all purpose flour. Bread flour creates a chewier, more airy crumb but both flours will work similar.
If your kitchen is cool, fermentation may take longer. If it is very warm, then the process will happen faster.
Remember to just have fun and enjoy the process.


Leave a comment